Showing posts with label attic. Show all posts

Friday, 29 May 2015

Picture dump

I haven't updated in a while, so I'm gonna do a picture dump with a little commentary.

I started removing paint from the front door. It's a mess!

We'll perservere.

We also installed much needed blinds in the attic windows.

We doubted a long time about the colour, finally went with white.

They absolutely block the light.
Shellac!

There was a spare night table around so I washed it, shellac-ed it,
and it is now extra storage in the attic bedroom.

The bathroom vanity suffered water marks, so I fixed it...
The first layers of shellac I used, I mixed well with all the wax contained in the flakes. I found info that the wax is more protective against vapour, which worried me more than a few droplets of water (we ventilate a lot but showers happen). However it is less water resistant.

I rubbed the spots with alcohol and a piece of cloth, which worked quite well, and then gave a few more layers of shellac, this time skimmed from the top of the mix. There will still be wax, but less. If this doesn't perform well enough (we are trying to splatter less, but we're human), I'll have to bring out the varnish :(

And... workshop! I'm very excited about the workshop ;P but it needs lots and lots of work...

Closing gaps with PUR.

Plastering.

Installing water pipes.

Putting up plasterboards.

Water, yay!

Saturday, 18 October 2014

Another update

I'll probably post after this weekend, but here goes this for the last few days.

Didn’t post last weekend. We worked on the same things, mostly. The attic plastering is done, and I washed the brick wall with warm water and soap. This didn’t remove all the dust, but a lot of grime.


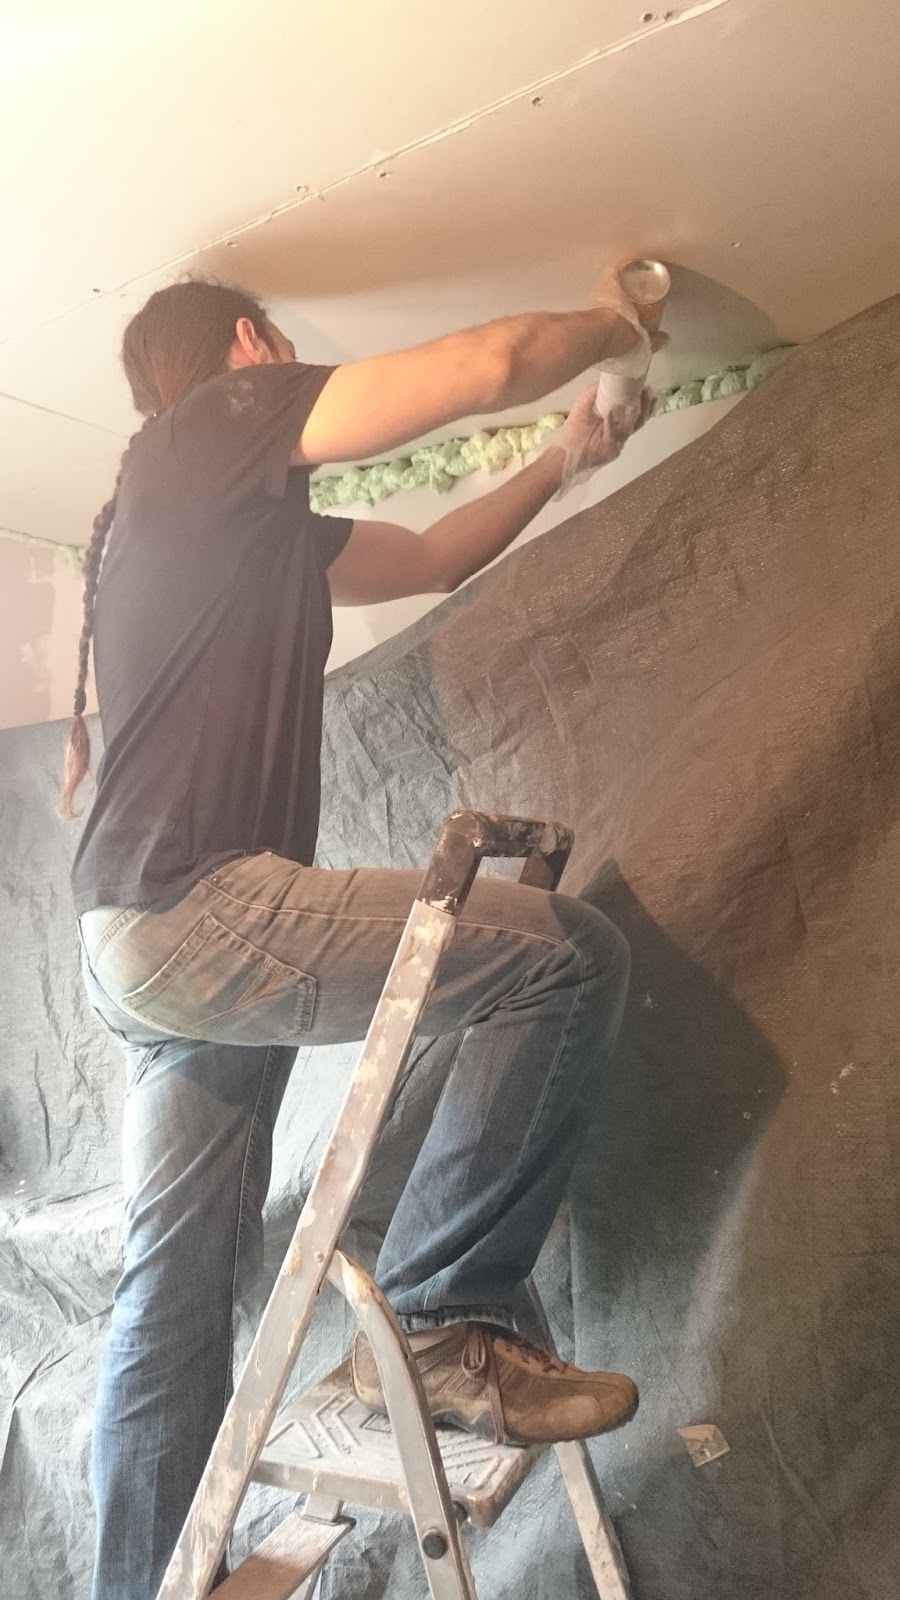
We’ve since vacuumed all the walls, and primed the bricks and the plaster (a spirit-y primer for dusty undergrounds, it feels -and smells- like thinned down glue). This really seemed to fix the dustyness problem on the bricks! Today I painted, with Pim's help on the tipmost, highest corner. Ran out of white paint. More pictures soon.


Something that feels like an achievement is the installing of the glass enclosure for the shower! I had lots of concerns but it worked out allright.


Here are a few older pictures, when we were setting up the shower tray:

Mounting wooden sides to tile over
We used different products for mounting, elastic or firm, depending on the needs of the area

Tiling over the shower tray and the strip of plastic that makes it watertight


Attaching the aluminium profile where the glass is secured

Perhaps the most critical moment was carrying the very large, very heavy sheet of glass upstairs. There were also some loose plastic strips that go between the glass and the aluminium profile, and they have to sort of magically stay in place while you insert the glass in the profile, or the profile on the glass. Very puzzling, but Pim solved it by putting a fell dollops of glue here and there and putting the strips in a strategival formation, and that worked. It would have been better if the glue would have been transparent instead of white, since the strips are also transparent, silicon perhaps, but the residue is barely visible anyway. And the aluminium profile is lackered white (lucky that there was an option aside from silvery - black was available as well).

The striped glass is very cool I think! it does play some tricks on the eyes when combined with the grout lines of the tiles, but I am already getting used to it.

The enclosure is not actually completely closed. This is more of a “step-in” shower. We’ve had a very bad experience with (sliding) doors in our current shower, and didn’t want to touch one with a 9 foot pole. Granted, it is probably the worst quality you can possibly find (plastic everything, which degrades very fast and is impossible to keep clean, and including the moving parts, which of course break all the time). I’ve still come to hate them so much that I didn’t even want to try a better quality enclosure with doors. Moving parts are bound to break sooner or later anyway.
Before this, I had only experienced curtained bathtubs, which also get annoying when the curtain sticks to you -_-

Yay!


Firmly secured

So this enclosure is just a couple of sheets of glass, one large along the sower tray (which is 140 cm long), and another 33 cm wide (one third of the width of the short side of the shower) which stands at right angles with the large glass. We took the model with a corner out of concern for splatters. There’s an aluminium profile against the wall and another at the corner where both panes meet. There’s also a small block of aluminium holding the small glass in place against the shower tray, and an aluminium arm over the top, grabbing the large glass and fixing it to the wall opposite.

Attached to the shower tray


To attach the small block to the shower tray, we had to make a hole in it. I was concerned about this since the shower tray is enamelled steel plate, and as an enameller I only know too well how enamel can crack under pressure. The trays available in the shop where we bought the enclosure were all acrylic and composite stone, which pose no problem.
So I took my small diamond tool (as used by dentists) and removed the layer of enamel before Pim perforated the steel. Perhaps overkill, but worked like a charm :)

Once everything is in place, the structure is very rigid and secure, even though it looks airy. I hope it is not too airy :) it may get drafty in there, being used as we are to a small 90 x 90 cm closed enclosure in a tiny bathroom. The radiator seems to warm up the room very nicely, even though the door is still standing in the stair landing.

Handshower piece

We're also now busy installing the hardware in the shower. This piece had to be shortened a bit, so I sawed a chunk off with my jewellery saw. The saws are thin as hairs, but I am familiar with it and it goes better, more precise, than a hacksaw.

Monday, 6 October 2014

Last week's proggress

Attic: plaster joins on walls and ceiling; finishing around the windows with PUR foam, plasterboard and plaster; finishing the exposed beams (sanding, priming and painting). Pim's dad has an electric plane and Pim has used it to get the worst off (the beams are very rough and humidity protected with some sort of green stuff). I guess most people would either cover them up with plasterboard or nicer wood. I'm just smoothing them somewhat and then some thick layers of primer do the trick pretty well, you can still feel the grain of the wood somewhat. 

We'll keep this room pretty light since it may get quite dark in there in winter. I'll be white (broken white, RAL 9010) and a light-ish grey. I'll also leave the natural colour of the oak on the floor. We were unsure what to do about the brick wall. We've now decided to clean them off a bit and paint them white.

Bathroom: the bathtub is installed! I only have shitty phone pictures. The drains outside are also installed so now you can take a cold bath ;)
Dude comes today to start up the heating/warm water system, so warm baths coming soon! It is also starting to get chilly, so it is a good thing we'll be able to put the heating on.
The closet is also mounted, although it leans forward too much due to the inclination of the floor. We'll have to raise the front legs a bit. The shower tray is installed and tiled around (did I already mention that?) but we haven't installed the glass yet, and we ran out of grout. There also still a few tiles to place around some pipes and the bottom edge of the shower, over the wood.

And we finally decided which toilet to buy and ordered it! it arrived from England this week and we have put it together, but it isn't installed yet. We found out the drain we had prepared for it was too short, so we got an extra piece, and we need some diamond drills to be able to attach it to the floor. Hopefully this week. We have ordered more diamond drills, also to make a hole on the marble to install the washbasin. The bathroom is really coming together :D

Bedroom: keeps on giving me headaches! ugh. Mostly a paint problem after another, too tedious to even write about in detail. Last in the series: please remind me why I hate painter's tape, again?? 


Fresh plaster

Rough finishing

Fine finishing

:(

Drain from the bathroom
Attaching the bath drain (note the earthing)
Attaching oak grills as gas vents
(you're supposed to smell if it leaks)
I'll take better pictures soon

The oak lid is too light, but I am not gonna mess with it right now
One metal piece for the closet hinge was missing,
we improvised. I enlarged the inset...

And we used these strips, which work nicely

Bad photo, my specialty


Saturday, 13 September 2014

Update

Some pictures from last Sunday. Working mostly in the attic. Painting in the recently cleaned up workshop, finishing the new wall that divides the workshop from the attic bedroom:

Painting wooden trim to finish the tile edge in the bathroom


Painting bedroom baseboards and crown molding
Pim continued finishing the wall with some help from me:


Structure for the wall

Cabling within the wall

Cabling within the wall

New wall

Trying out white balusters

Sunday, 19 January 2014

More attic

Placing these heavy boards on
the sloped ceiling is very hard work
The insulation for the attic is all up! Boards upon boards of it. I only have started finishing with plaster, however, but since structurally it does what it's supposed to do, other priorities will come first.

I do really enjoy working with plaster, though, it is fun, although difficult to get it perfect with the little experience I have.

Plaster goo
This is a lot of fun (really)

5 radiators are up, 3 to go
The attic bedroom radiator is up and connected. We still have 3 to go: the bathroom (which will probably be delayed for a long time since the floor and the tiled wall need to be done first); the workshop, also in the attic, sometime soon; and the dining room in the back building, which is hibernating right now.

So we will probably start the heating system when the workshop radiator is installed, to heat the house up, and leave the rest for later.


Installing gas pipes, cool threading machine on the right

In order to install the kettle, the natural gas pipes had to be brought up to the workshop in the attic from the basement. For this Pim got help from a professional and they installed it in two days and then tested it for leaks.

Installing the warm water and heating system

Then he started connecting the water pipes to the kettle and the collectors. A single kettle takes care of the warm water as well as the central heating.

"Library"

I like the above image since it shows all the "layers" of the work we are doing on the walls. You see the wooden studs, the yellow glass fiber sound insulation, the polyurethane boards with plasterboard on top (and first stages of plaster finishing of the joins and covering of screws), the water and heating pipes, the electricity cables, and the gas pipe.

We caught a good deal at the DIY shop on some tiles we had been eyeing for the bathroom, so we bought them:

Bathroom tiles
They are, as it couldn't be otherwise nowadays, metro tiles ;P I could say that I truly have always loved them (several Ferrocarrils stations in Barcelona are covered in them), but who would believe me?
I was actually leaning towards flat oblongs for a plainer look, while Pim liked a bezel more. These have a very faint bezel, and everyone is happy. We bought 44 boxes with 44 tiles each.

I also finally found a suitable, cheap second hand chandelier (originally from Ikea) to use as a base for my bedroom lamp project. I have already started working on it... I'll have a dedicated post for it later!

As usual... the pictures are pretty bad. In fact, slightly more so than usual, since I have dropped my camera and the zoom lens is a bit broken, so we had to use our mobile phones to take pictures.