I've moved to www.1935.innershelter.net
See you there.
Sunday 15 April 2018
Sunday 26 November 2017


Tuesday 3 October 2017
Done/to-do lists, aseo and laundry room
Aseo

In this once completely bare little corner we (mostly Pim):
- Decided on all Important Items (toilet, washbasin, taps, lamps, tiles) and ordered them.
- Partly broke down and built walls out of brick, wood and plasterboard.
- Added all utilities (water pipes, drains, electricity outlets and switches).
- Tiled the floors and wall (partially) with gres mosaic tile (remaking the tile sheets into checker and stripes, which was lots of work).
- Grouted the floor (checkerboard) with black (since black recedes, white would have been more noticeable).
- Grouted the wall (stripes) in white horizontally between the white tiles, then grouted black horizontally between the black tiles, and vertically between all tiles (this was a huge detail work and I was super pregnant, so kudos go to Pim for going to this depth of craziness for my sake) a little piece of sheet rubber was key.
- Installed the toilet. We love this toilet, it has no crannies that can collect dust. His official name is Monolito, but we call him Manolito. (It is from Globo)
- Made close-to-the-ceiling mouldings out of wood (out of lengths of wood glued together), primed them, installed them.
- Made a pine framework as support for the counter and sink & storage, roughly, but nonetheless, mortise and tenoned! Made curtains for the door and storage (sliding doors planned in the long term).
- Cut a mirror, had it break when installing it, cut another mirror, installed it, breathed.
- Made mouldings for the mirror.
- Designed a marble surface and backsplash, had it cut by the marble guy, realised he simplified the shape, realised there was a design miscalculation, realised this way there is a bit of an awkward bit but there is more useable counter space, dealt with it to the point of liking it again.
- Installed taps & sink, towel rack and toilet roll holder (easier said than done when the tiles are super hard gres, some diamonds perished in the process)
- Installed lamps and led strip over the moulding.
- Painted Many Things Many Times.
- Refurbished a partly rotted and generally mistreated door found in the house (previously part of once upon a time living room division), added a mortise hole for the door mechanism, installed a vintage doorknob.
- Made a frame for the door (this is a lot of more difficult work than it seems) in a very narrow and awkward space (and a very wide wall). This frame is sui-generis but it works, it is level and square, and we are proud.
- Hanged the door!
- Filled in many crannies and nooks with different kinds of plasters and putties.
- Painted Many Things Many Times Again.
- Bought towels, washbasin accessories & picture frames, found art, printed art.
Still to do:
- Sand up various putties and Paint Again.
- Hang picture frames & curtains.
- Clean up.

Laundry room
This room has contained our laundry machine and dishwasher for years now. It has been used as a laundry room in the past.
We found its drain just drained into the soil under the court concrete (!!!) at some point and Pim had to break it all up and find the drain and re-drain everything. That was an UGH.
Now we had to temporarily move the machines to the kitchen-to-be, in which Pim has already placed drains, in order to work here. I suppose the dishwasher will also need to move back once we have to start working on the kitchen.
In this room, again mostly Pim:
- Placed water distribution points for this part of the building.
- Placed drains and water pipes, electricity outlets, switches.
- Decided on all Important Items (through, taps) and ordered them.
- Ordered counter marble and blue stone steps.
- Made one too high step into two steps which go up to the kitchen straight-ahead and the aseo to the left (some new drains also fit under these steps).
- Covered the thrown-together walls with plasterboard, covered with cement the low parts of the wall that suck in humidity from the soil outside (at this level the floor is higher outside), painted the plasterboard with tiling primer.
- Installed aluminium corner edging to finish tiled walls.
In progress:
- Tiling of the walls. We're doing a basket-weave with 1:2 white bezel metro tiles (same tiles we used in the bathroom upstairs). Grout will be white. We're keeping the vintage terrazzo floor (this is a checker pattern made with leftovers from three other lower-story rooms, original from the 30’s). Windowsill will be made with some marble strips we bought for the bathroom and never used.
- Making a pine framework as support for the counter and sink & storage.
Still to do:
- Install the lamp (which will come from the attic which now has a replacement). Install an additional electric water heater to have warm water quick in this part of the house (the main heater is in the attic).
- Make a cabinet to cover the water distributions and heater.
- Make a folding drying rack.
Monday 31 July 2017
Little bathroom
I'm hopelessly behind on updates here. Little baby, no time!
The little bathroom is very close to "finished". Here we stand:

More, perhaps, another time!
The little bathroom is very close to "finished". Here we stand:

More, perhaps, another time!
Saturday 25 February 2017
Small bathroom progress
It's been a while since I posted about this, and there has been a lot of progress.
The galleries I managed to "make work" here in terrible, terrible Blogger look like they're actually getting worse every day! I have added some captions to the images but they only show over the thumbnails in ALL CAPS now, wtf?
In any case, what Pim has been working on (I am really not doing anything of this anymore, I am due to give birth any day now):
- Put up electricity for aseo, laundry & kitchen
- Pipes for aseo & kitchen
- Tap fittings for aseo
- Drains for aseo, laundry & kitchen (lots of cutting and digging into the floors here!)
- Plasterboards for aseo, laundry & kitchen
- Self-levelling screed / compound / mortar for aseo floor which was very uneven
- And he's also been re-setting the tiles on the mesh since I couldn't bend over anymore!


Wednesday 4 January 2017
Taps
The taps have arrived one month before we expected them to!
They look fantastic. Here's a taste, some handles in the three different finishes we chose:
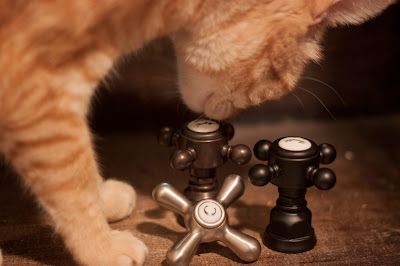
We've chosen brushed nickel for the kitchen and the laundry room, opaque black for the small bathroom and Tuscan brass for the workshop. The latter is an unprotected patina, so it will change with use, same as our raw brass taps in the bathroom.
All the taps in our house are Nicolazzi.
They look fantastic. Here's a taste, some handles in the three different finishes we chose:

 |
| Brushed nickel, Tuscan brass and opaque black |
All the taps in our house are Nicolazzi.
Sunday 25 December 2016
Small bathroom tile I
We picked up the tiles for the small bathroom, which I call aseo. Both the bathroom and the tiles are small ;)
They come attached to mesh backing, all tiles on a mesh the same colour, of course. So in order to have checkerboard and stripes, we either have to remove them all and place them one by one (bit of a pain in the ass since they're 5x5 cm) or rearrange the tiles on the mesh.
I've begun working on rearranging them. The white tile sheets are separated from each other by a waxed paper, which comes in handy, but the black ones do not have it.


First I remove alternating tiles from the mesh, they come off easily, while trying to not distort the mesh. I then I lay the sheet over the waxed paper, apply a little PVA glue (white wood glue) to the back of the tile (of the opposite colour), and lay it carefully. I guide myself by eye and also some 3mm (the given grout line in the mesh) layout crosses. The tiles are not perfect and even, so some eyeballing is always necessary. I lay a sheet on top of another so that the weight will help them set and not shift.
I think it took me about two hours to do one square metre. I have the impression the stripes are gonna be more time consuming ;) it is also a lot more surface.
Friday 23 December 2016
Plans for the back building
We've been mostly planning the next renovation phase: the "powder room*", laundry room, kitchen and dining room.
*What a stupidly euphemistic name. In Spanish we call this aseo: a small room with a WC and a washbasin, literally a place where you tidy up yourself. I guess powdering might be considered "tidying up", but, really? anyway.
Planning is incredibly important, we've found. We go over things over, and over, and over, and over again and we always find something we were mistaken about, or we had forgotten. It also happens that you change your mind 3 or 4 times, I think, mostly for the better.
We've been mainly focusing on the aseo and the laundry. These are immediately adjacent the main house building (the living room which is a temporary kitchen at the moment), and, with a baby on the way, will come in very handy as you can imagine. The kitchen and dining room can wait since we have functioning ones, temporary and super messy, but functional. The laundry is also functional at the moment, with the laundry machine and also the dishwasher connected there.
So we have been planning the distribution of the aseo, which is no easy task since it is a tiny 1 x 1,2 m room, and we are recycling a door found in the house (72 cm wide). And I did not want the door to swing outwards into the narrow passage/laundry, particularly since you'll have to go up a couple of steps to go into the aseo, and that seems very awkward to me.
We finally chose and ordered a WC (I love how easy it must be to clean this one! all stupid crannies hidden in a smooth ceramic column :)), a vessel sink (with overflow, many vessel sinks do not have one! dangerous...), the tiles (going for Winckelmans gres again, which we're loving), the taps and hardware (also very happy with our choice in the bathroom), and the lamps (going for a bit of a fancy-design thing this time). We'll build the counter for the sink ourselves, of ebonised oak and carrara marble. A wall to wall mirror and possibly some led strip lightning over the moulding on the ceiling and that's all that's necessary. We have also ordered the laundry sink, but I'll talk about that later.
The colour scheme of the room will be very strictly black and white. I'm quite inspired by razzle dazzle camouflage paint from WWI for this! Really looking forward to it ;)
So far we have received the WC, we will pick up the tiles tomorrow, and we got a dispatch notice for both sinks. Both lamps and taps (bit of a special order) are due in February.
Structural work has already begun, and, as I'm getting large and clumsy, I am not helping with this hard, dusty as fuck work at the moment. Pim's been cutting at the walls with the angle grinder, in all the places where electricity switches & ducts, and pipes of all types have to be built into the wall. No insulation/plasterboard in this building, so lots and lots of cutting!
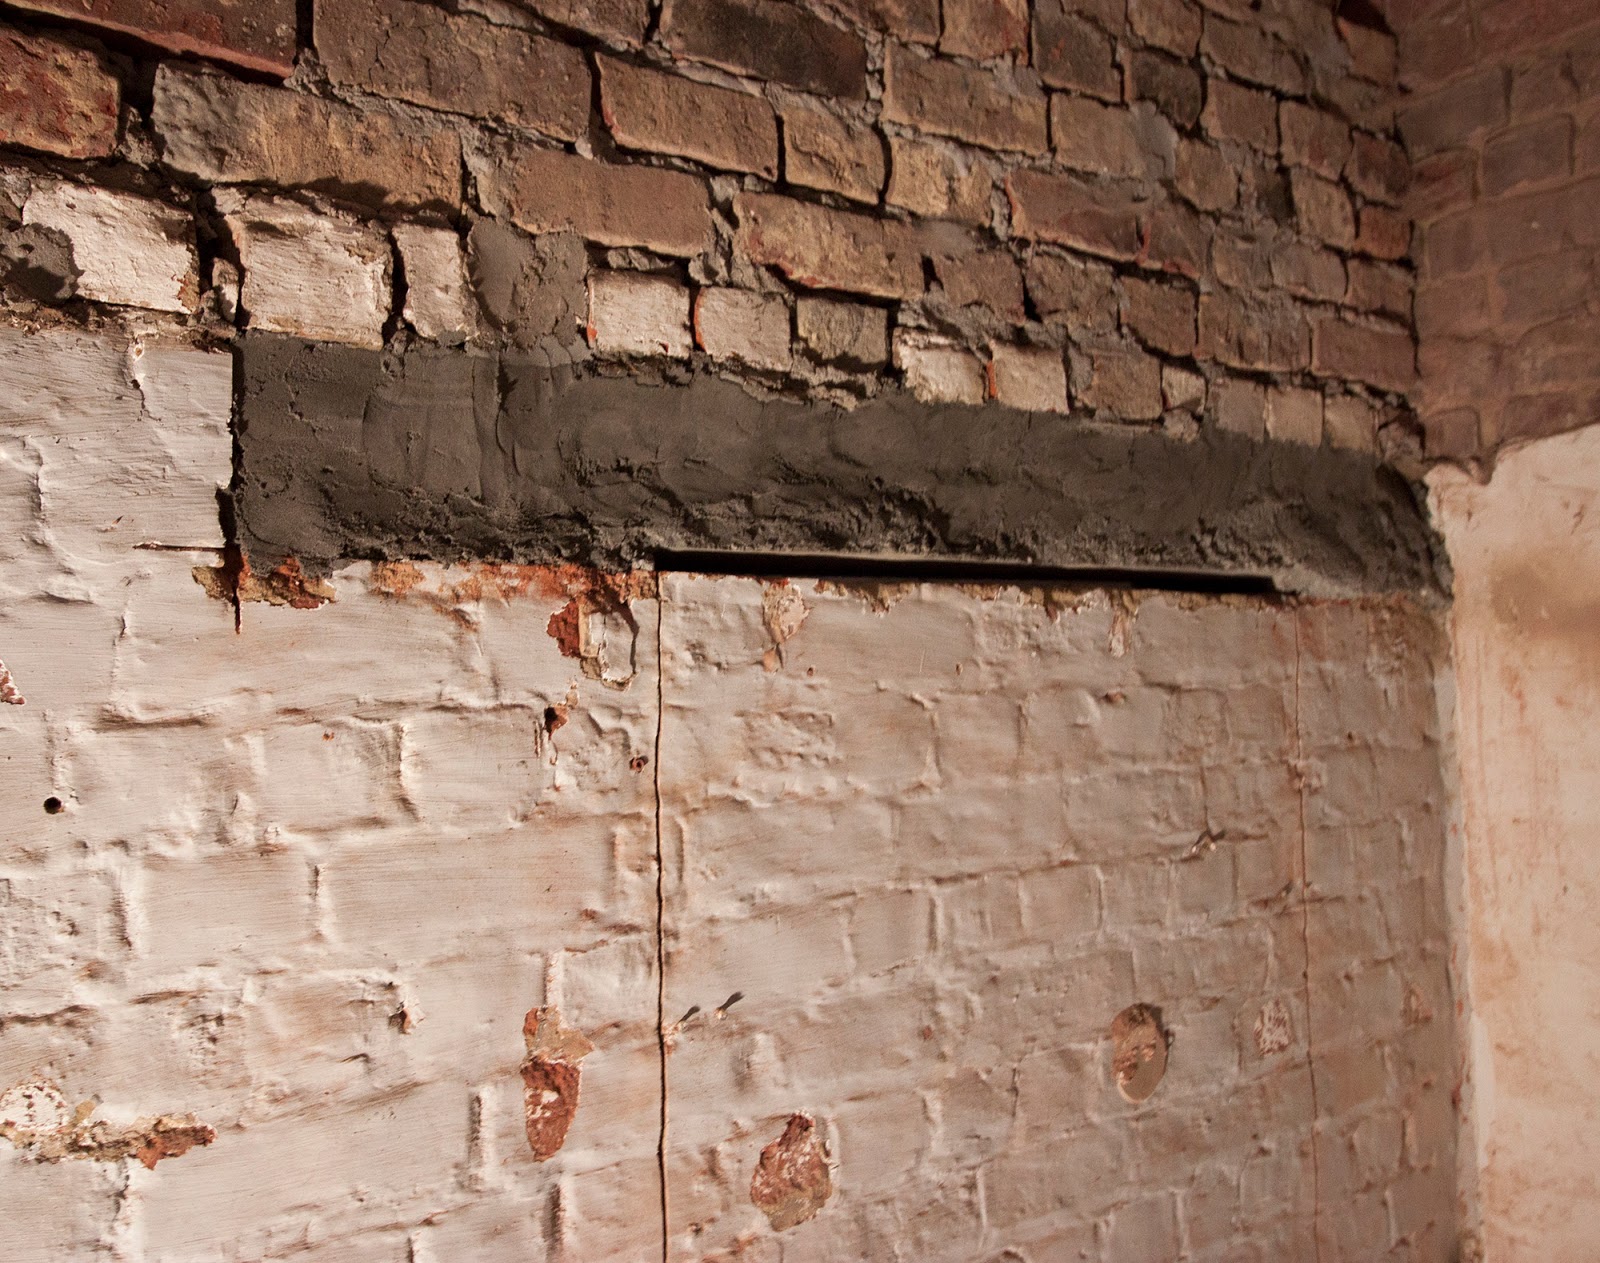
He's already built the threshold (recycled steel railroad beam + concrete) for the aseo door (this was simply a solid wall before), and begun building the wall that is missing at the moment, between the aseo and the kitchen. He also cut off a chunk of wall between the laundry and the kitchen, because the passage was unnecessarily narrow:
*What a stupidly euphemistic name. In Spanish we call this aseo: a small room with a WC and a washbasin, literally a place where you tidy up yourself. I guess powdering might be considered "tidying up", but, really? anyway.
Planning is incredibly important, we've found. We go over things over, and over, and over, and over again and we always find something we were mistaken about, or we had forgotten. It also happens that you change your mind 3 or 4 times, I think, mostly for the better.
We've been mainly focusing on the aseo and the laundry. These are immediately adjacent the main house building (the living room which is a temporary kitchen at the moment), and, with a baby on the way, will come in very handy as you can imagine. The kitchen and dining room can wait since we have functioning ones, temporary and super messy, but functional. The laundry is also functional at the moment, with the laundry machine and also the dishwasher connected there.
So we have been planning the distribution of the aseo, which is no easy task since it is a tiny 1 x 1,2 m room, and we are recycling a door found in the house (72 cm wide). And I did not want the door to swing outwards into the narrow passage/laundry, particularly since you'll have to go up a couple of steps to go into the aseo, and that seems very awkward to me.
We finally chose and ordered a WC (I love how easy it must be to clean this one! all stupid crannies hidden in a smooth ceramic column :)), a vessel sink (with overflow, many vessel sinks do not have one! dangerous...), the tiles (going for Winckelmans gres again, which we're loving), the taps and hardware (also very happy with our choice in the bathroom), and the lamps (going for a bit of a fancy-design thing this time). We'll build the counter for the sink ourselves, of ebonised oak and carrara marble. A wall to wall mirror and possibly some led strip lightning over the moulding on the ceiling and that's all that's necessary. We have also ordered the laundry sink, but I'll talk about that later.
- WC: Globo Paestum Monolito with an ebonised oak seat
- Sink: Scarabeo In-Out drop-in
- Tiles: Winckelmans 5x5 cm black and white square
- Hardware: Nicolazzi 1477NO70 nero opaco half dome wall mounted + paper holder / towel bar
- Lamps: Karboxx Escape cube
 |
| Obligatory crap-collage The hardware finish is all wrong! and also wrong tap handles |
The colour scheme of the room will be very strictly black and white. I'm quite inspired by razzle dazzle camouflage paint from WWI for this! Really looking forward to it ;)
So far we have received the WC, we will pick up the tiles tomorrow, and we got a dispatch notice for both sinks. Both lamps and taps (bit of a special order) are due in February.
Structural work has already begun, and, as I'm getting large and clumsy, I am not helping with this hard, dusty as fuck work at the moment. Pim's been cutting at the walls with the angle grinder, in all the places where electricity switches & ducts, and pipes of all types have to be built into the wall. No insulation/plasterboard in this building, so lots and lots of cutting!
He's already built the threshold (recycled steel railroad beam + concrete) for the aseo door (this was simply a solid wall before), and begun building the wall that is missing at the moment, between the aseo and the kitchen. He also cut off a chunk of wall between the laundry and the kitchen, because the passage was unnecessarily narrow:


Insulation II
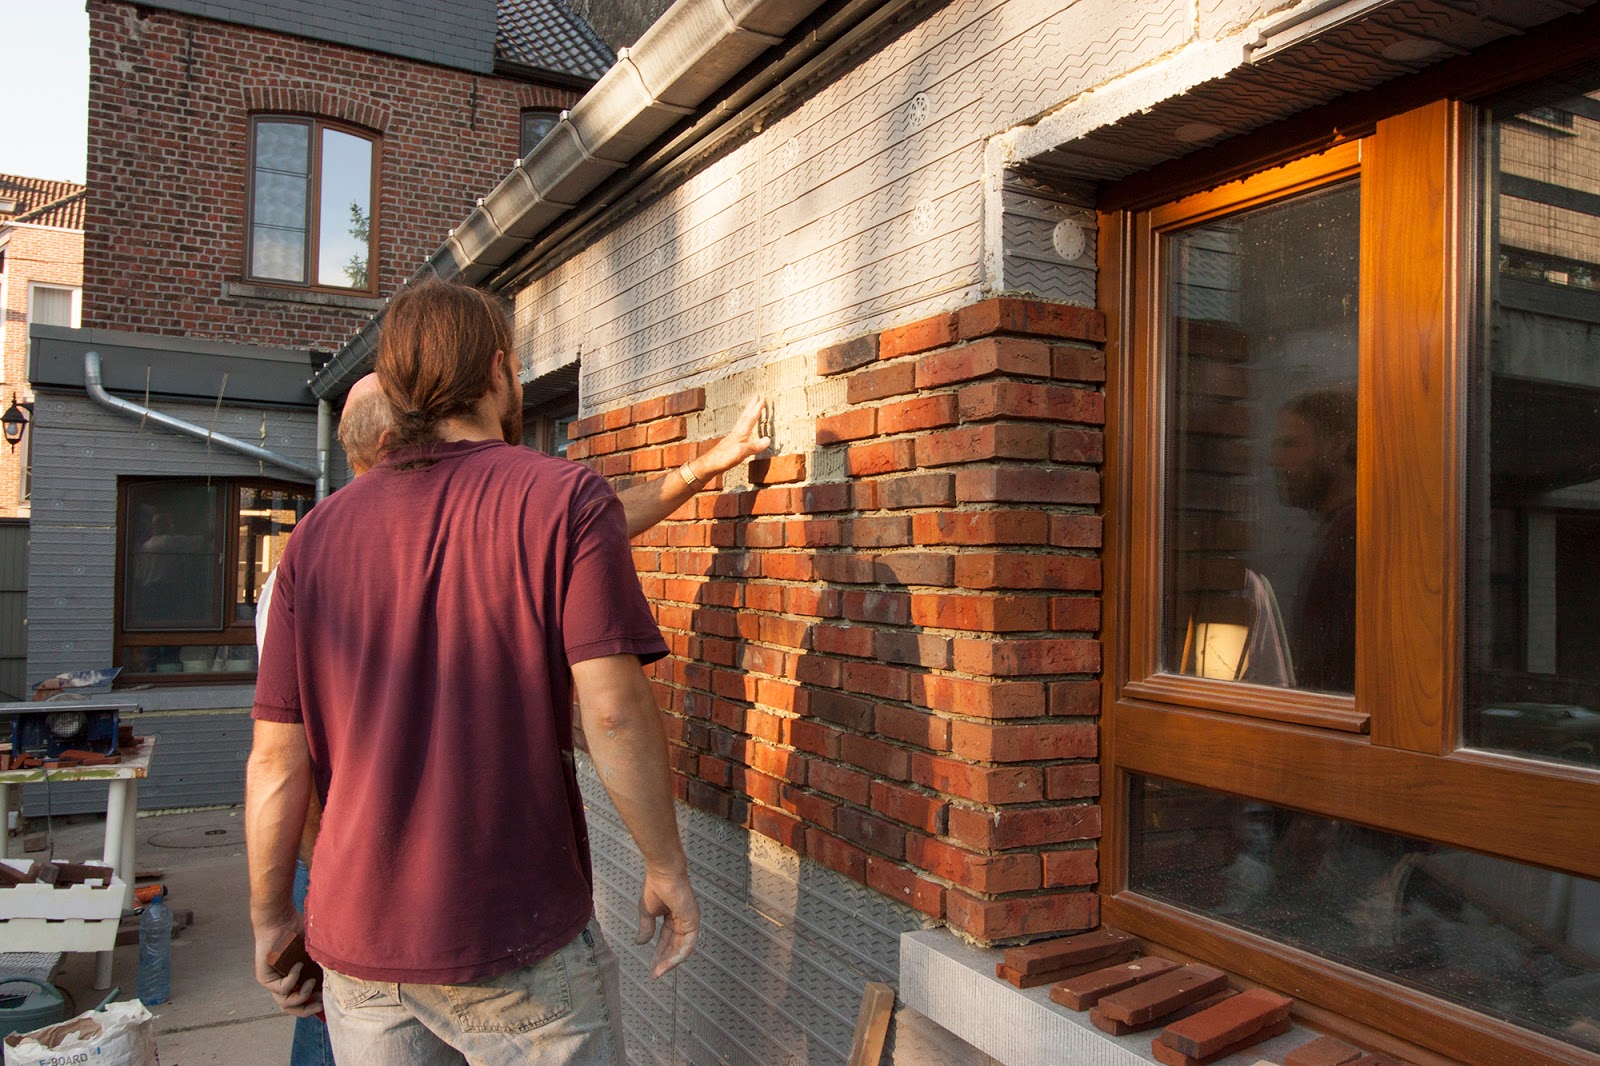
I realise I never posted about the "finished" result of the insulation of the back building. I say "finished", because we consider it finished for the time being (and we stopped working on it about mid November). The insulation is on, the bricks are on, all gaps are closed, the gutters are on, and this is going to be all for the winter. There is still grouting between the bricks to do, but that will be a summer project. We're now moving on to the inside of the building.
So this is the "finished" result:
So this is the "finished" result:


Friday 14 October 2016
Insulation
Next in house project is to insulate the back building on the outside. The width of the court allows us to do this, instead of losing space on the inside (which we've done on the rest of the house), the back building is only 3 metres wide. It also allows us to cover the very messy bricks of this part. The terrace had to be done first since the insulating foam and thin bricks that go on top will overlap the floor.
Pim finished the drains that come from the gutters, and he and his dad had to replace a couple of windowsills still, since they were not deep enough for what the new thickness of the wall will be.
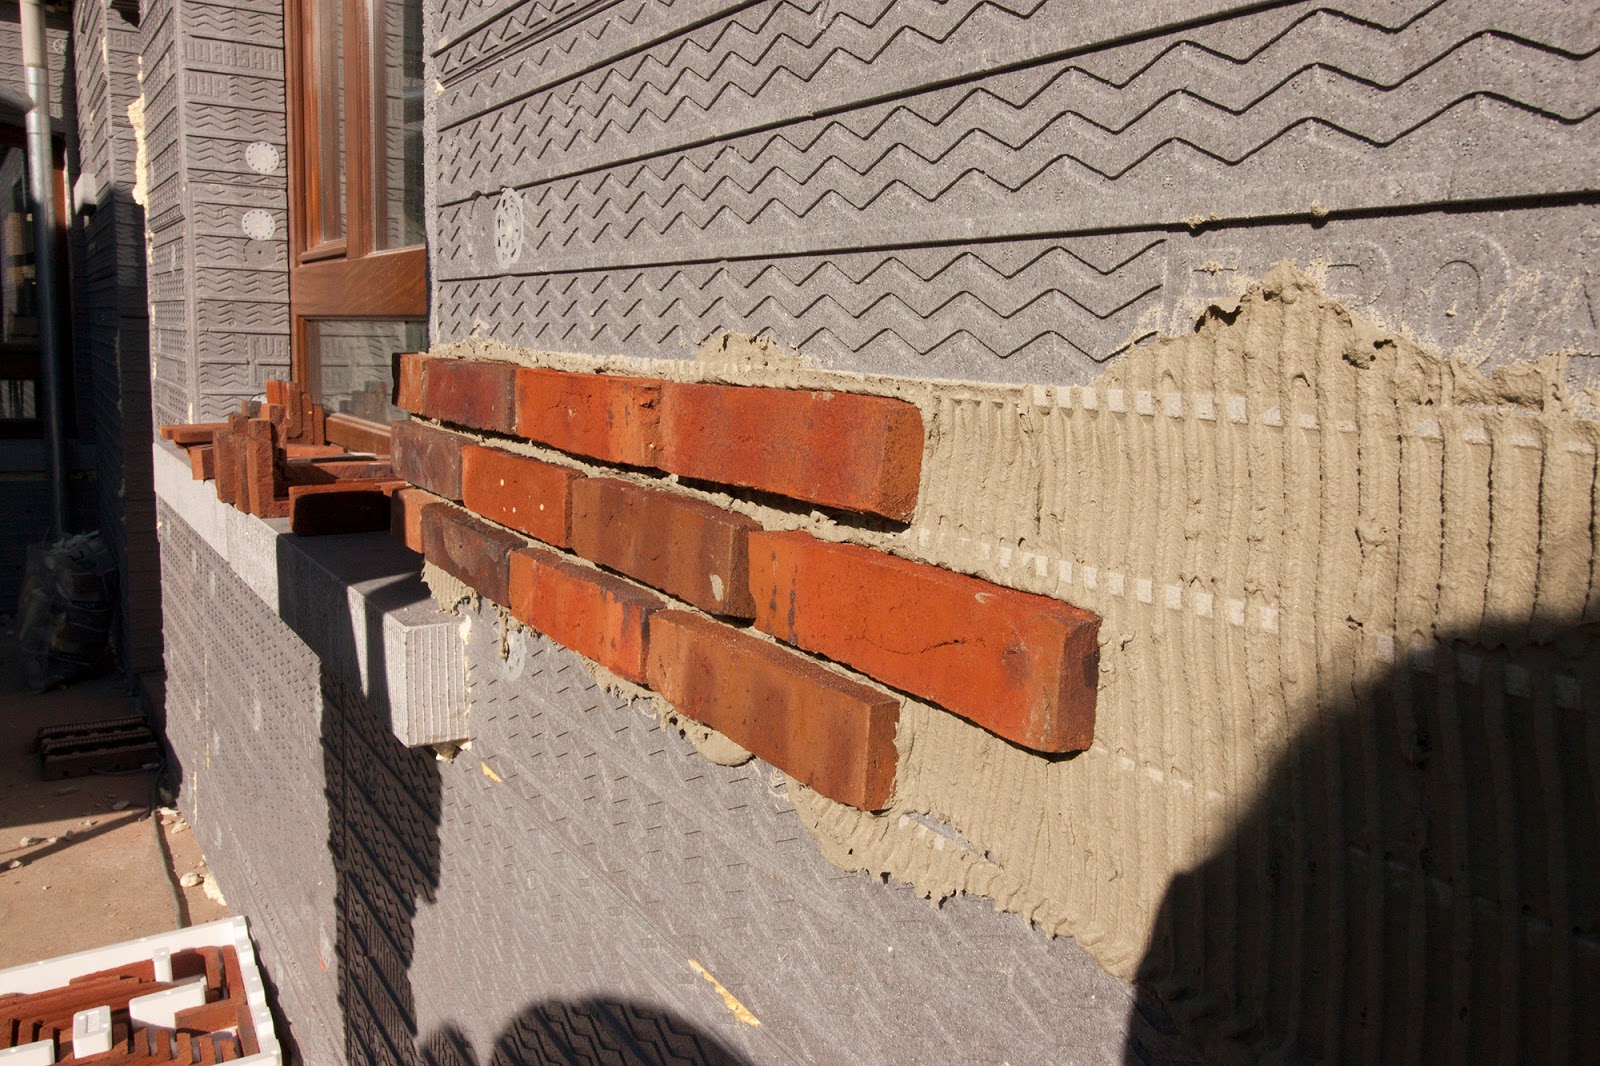
Then Pim removed a layer of pieces of marble someone had attached to the bottom of the wall, washed the flaky paint (painting over moss is never gonna work, people) away with a Kärcher, and filled all gaps and largest unevenness with cement so that the insulation would glue to the wall properly. The insulation has guides to place the bricks, so they have to be placed level and correct (some bricks over windows etc go vertically), this is very important.
So lots of thinking, measuring, then finally cutting a gluing with a special cement glue.
The entire back is now covered in... polystyrene :D looks total class! We still have thinner insulation to glue to the edges of the windows, screw everything down, then glue the tile-bricks.
We can't wait to move on to work on the inside, the kitchen (!!!) and the dining room. We will have to, soon, due to the weather. We've already ordered the tiles for the floor :)
Pim finished the drains that come from the gutters, and he and his dad had to replace a couple of windowsills still, since they were not deep enough for what the new thickness of the wall will be.
Then Pim removed a layer of pieces of marble someone had attached to the bottom of the wall, washed the flaky paint (painting over moss is never gonna work, people) away with a Kärcher, and filled all gaps and largest unevenness with cement so that the insulation would glue to the wall properly. The insulation has guides to place the bricks, so they have to be placed level and correct (some bricks over windows etc go vertically), this is very important.
So lots of thinking, measuring, then finally cutting a gluing with a special cement glue.
The entire back is now covered in... polystyrene :D looks total class! We still have thinner insulation to glue to the edges of the windows, screw everything down, then glue the tile-bricks.
We can't wait to move on to work on the inside, the kitchen (!!!) and the dining room. We will have to, soon, due to the weather. We've already ordered the tiles for the floor :)


Subscribe to:
Posts (Atom)