Saturday, 28 May 2016

Monday, 16 May 2016

Terrace

Terrace coming soon!
Pim has been putting a stabilised sand floor (chape? screed?) as a base for the terrace. This is sand from the garden with some cement. He's reinforcing it with some wire meshes that are like mini-rebar. I'm sorry, our English building terminology is failing us hard here :)

All this underfloor is now delimited by a concrete and rubble (we're going Roman here) frame he poured to be the foundation of a future greenhouse/conservatory thing.

Brick floor soon!

Tuesday, 3 May 2016

May 2014, May 2016

Facebook prompted before & after, two years and two days:

The hillbilly roof protected our tomato crop for two years

Sunday, 1 May 2016

Digging

Pim's been digging out the terrace. It's a lot to dig...

Today Pim's dad has also removed the add-on to the corner of the back building. We think that was there just to attach a door that is now long gone, we also found some evidence in the rubble (lots of rubble! this space was used as a dump) in the ground that Pim dug out. It wasn't really supporting anything. He then started reconstructing the corner.


Not kidding about the rubble, and this is only a fraction


Pim's also now trying different configurations for the stairs leading to the upper level. We of course make drawings, and plans in sketchup and stuff, but there's nothing like seeing it in place and going up the steps.


Sunday, 10 April 2016

Dining room platform

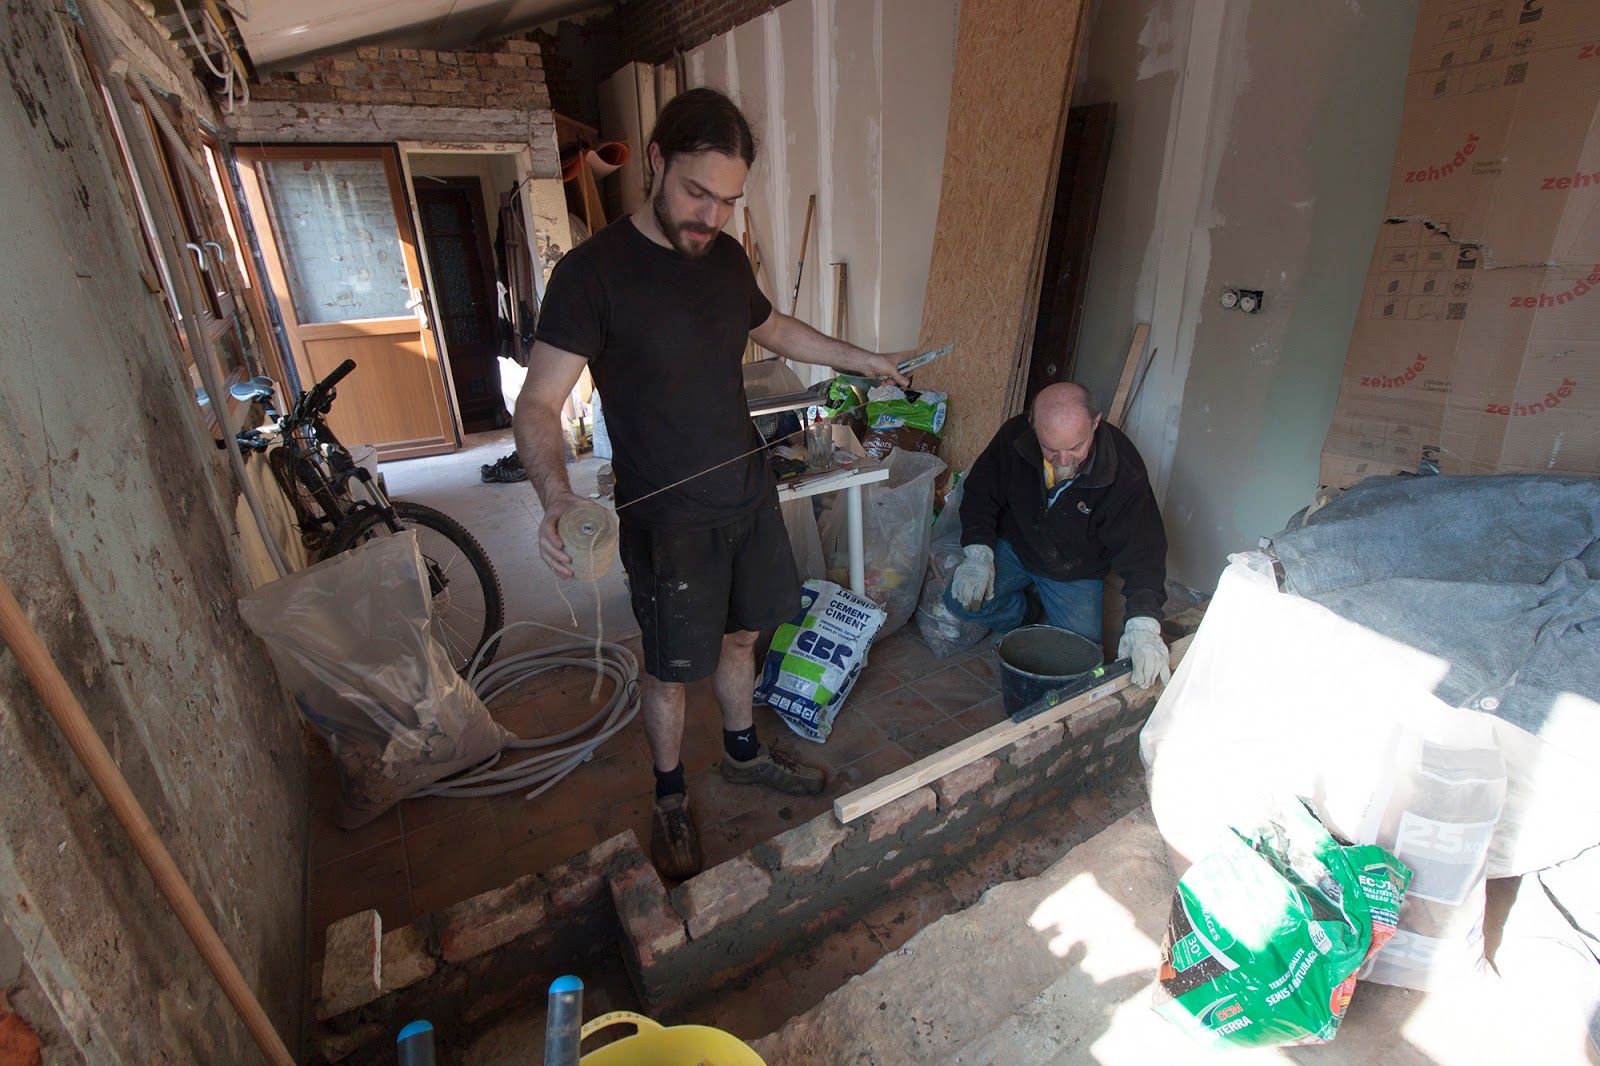
We are still on a new window high! but new work has started in the kitchen-dining room. The dining room will be raised on a platform at the back of the room, due to the structure of the building and the incline of the terrain. It used to be a shed, divided from the rest of the structure by a wall, and higher up. All those walls are now gone but the raise remains, when everything is levelled up nicely, the difference will be 30 cm so we need two steps leading up from the kitchen.

Pim's dad started building the steps with recycled bricks, I thought he went incredibly fast!


The gaps will be filled with cement and rubble (boy don't we have rubble), and then the floor evened out with a runny cement mix. Then tiles, but not before the walls and their corresponding mess are done.

Pim has still been digging the terrace outside, and I could barely move due to my sciatica flaring up, but managed to shuffle around some pots and seeds now that spring is here.

Tuesday, 5 April 2016

Kitchen window post

This post was a long way coming. Since I have a lot of images to post, I have been experimenting with some code added to the blogger template in order to have galleries to display the images. It is very clunky but it does the job. I should seriously consider importing this blog into my main website blog, but I have to think how and if I'd still like to keep it more separated.

Meanwhile, let us continue.

It has been cold, wet, and miserable. January and February are not pleasant to work around outside here. Luckily Pim and his father do not seem to mind too much, I have bad joints and I just can't work in these conditions, so besides a coat of paint in a small surface while wearing a Peruvian oversize pullover (what a wuss right?) I have done nothing of this project until the windows were in. By March however I have started gardening ;P

In the gallery below we pick up where we left in the last post:

  • Sliding door beam concrete-d, bricks removed, edges redone. First time we can really see some of the garden from the house. In this case, a big pile of bricks :D
  • Dining room window (where the shed door used to be) beam placed and concrete-d, bricks removed to widen, bricks added to make door into window, edges redone.
  • Bit of wall where the radiator goes gets painted, green of course, and the radiator put up (it was in the way, this is one very large and 100 kg heavy motherfucker).
  • Existing door widened, some bricks added between the pre-existing door and window for a stronger structure.
  • Existing window narrowed and lowered to be as low as the kitchen counter.
  • Outer windowsill stones (Belgian blue sandstone) placed. Some of these are very heavy... unlike other windowsills in the house, we had them delivered, but Pim and his dad installed them. I was able to help moving a couple ;P
  • Threshold stones placed, same as above.
  • After some delay, windows, door and sliding door/window? placed by the window guys today!
  • And now PHEW!
And now, onto other kitchen things... walls, floor, insulation...

Sunday, 31 January 2016

Next beam + bathroom closet

While Pim and his father were placing the next beam for a window in the back building, I took everything out of the bathroom closet, we took it apart, and then I cut a bit off the back legs. The floor in this room slopes towards the center and so the closet was leaning forward a lot. I guess I must have take a picture of that at some point, but I don't find it now. The top of the closet was 10 or 15 cm away from the wall when the bottom was close to the wall.

I also glued back a decorative leg piece that had fallen off, and some other parts where the hide glue had fractured a long time ago. I softened the glue with wet (warm water) kitchen paper towels, then scraped the excess off, and reglued with Titebond liquid hide glue. I think I am a convert now ;)

We put the closet back together, which is a delicate operation since the three door are caught by the top, and have to all be placed at once. It is a three man job.

This is how "level" it was

Knife wall

Chunks off

Scraping old glue off

Re-gluing

Quality control

Straight up 
Nice and close to the wall :)

On the beam front, Pim and his father encountered more difficulties than last time.


The beam that the roof guys placed over the entire length, on top of the wall, was anchored to the wall with large bolts. This made removing the old beam over the door a little difficult. This opening had to become much wider than the door so the beam had to be replaced. Pim had to drill around the bolts, concrete will later be placed around the bolts to anchor them again.

The beam was again placed over to flat and level pieces of concrete

Another recycled railway track serving as beam

Sunday, 24 January 2016

Sliding door beam


I have not been updating, we've been doing many little and finishing things, and I didn't feel like writing about those. Today however, Pim and his dad started something rather big.
We've ordered the last batch of windows for the house, for the future kitchen/dining room. These take a few months of queue and manufacture, and we've now started actually making the holes where they'll go. On the very end of our house, we're putting a large sliding door that will cover most of the wall. This was the shed, and it will be the dining room. On the picture above, you see where the hole for a beam was started. The wall of the building to the right is the neighbour's (I think it's a horse stable). This is the area where we had the hillbilly tomato roof, which we have now removed.

Pim screwed some extra pieces of wood with very large screws to hold the top portion of the wall up while making a hole and installing the beam. It was all done today as quickly as possible, and the structure held very well (the roof is mostly supported on the back and front walls anyway).

Pim's dad working on the wall. 
Above you can still see the beam that we used. They're repurposed "vintage" railroad tracks. There were several of these in the back/shed, holding up a very strong flat ceiling in concrete that we removed some time ago. The space on top of it as you can see was very small, all in all a little puzzling, it was probably the strongest ceiling of the entire house. Maybe they stored gold bars in there, haha.


The leftover beam.

Pim cut off the necessary piece of beam that we had been keeping in place, and they placed it in the hole over two flat and level blocks of concrete they had placed over the bricks.


Beam in place over the concrete blocks.


Beam in place over the concrete blocks.


More cement.


Reinforced with chicken wire.

To fill the gap over the beam again, Pim placed some recycled chicken wire we found in the garden, then concrete. So in a way it is reinforced concrete. A piece of wood and some plastic closes the gap below.


Reinforced with chicken wire.

This is not the way these things are normally done, everything would just come off and the beam placed, but we didn't want to leave this entire part of the building open to the elements in January for who knows how long... once the date to place the windows approaches, we'll remove the rest of the wall.

The same still has to be done for a couple of windows, also. We have other pieces of railroad for that.

Tuesday, 29 September 2015

Wide angle befores

We're not updating very often anymore, but here comes a biggie. We have other things to write about, but that'll have to wait. 

We got a wide angle lens and it's awesome, we should have gotten it much sooner! It'll be great for before and after shots, too bad we'll have to do with in-between and after images. I went around the house and the garden and took a few shots. These are 100% unstaged, I did not clear anything away for them, tools, rubble, and everyday mess. So a bunch of befores.

Hall and staircase:


Front living room:


Back living room (currently "kitchen"):


Future kitchen and dining room, as you can see we have lots of work ahead:


We have ordered the new windows and door for this space, and after paying for that we'll be out of money and will need to save before we can afford the kitchen proper.

Outside court:


Bathroom, which is the second most finished room:


Bedroom (most finished room but not quite there yet):


Workshop landing:


Workshop:


Attic bedroom (spare now):


And a couple of the garden (more here):