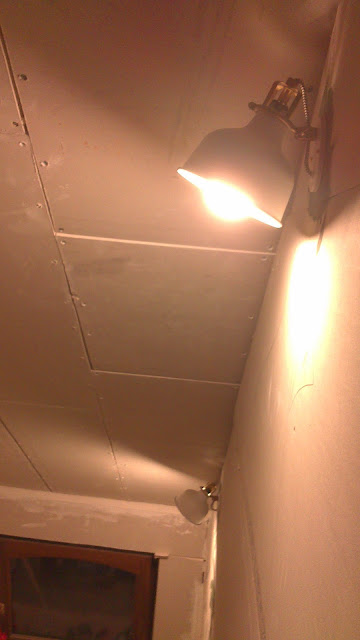
For the next two landings, between the first and the second floor and on the second floor, we have an inclined ceiling, and we did not want to install pendant lamps, but a couple of wall lamps instead.
 |
| Ikea - Ranarp clamp spotlight |
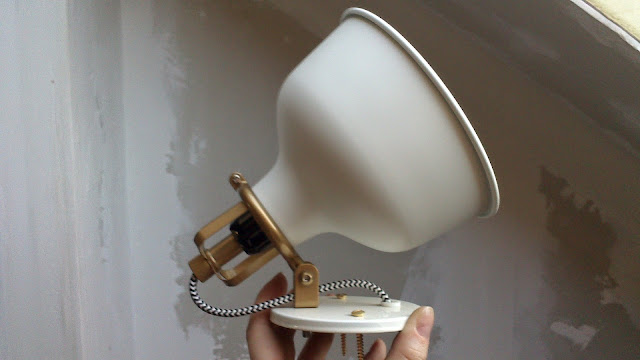
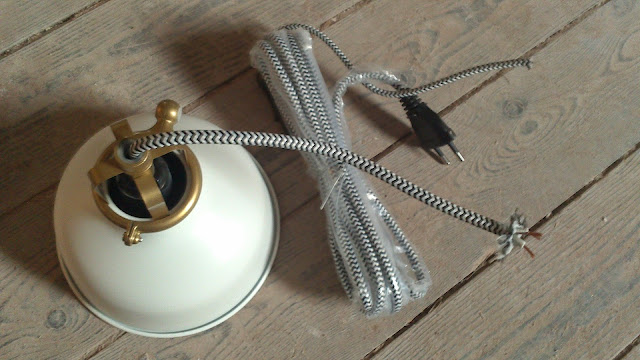
Unfortunately, I think, as a wall lamp, the Ranarp clamp spotlight model leaves much to be desired. It is a rather decent (for its price, for sure) clamp-on desk model, although I think the chromed clamp doesn't really fit well with the rest (black, golden, white), which is quite handsome. But the attachment to convert it to a wall mounted lamp is poorly designed, and leaves a lamp that sticks out a great deal, with a long cable, switch and plug hanging off it. I understand the cable part will be desirable to many people, but we were looking for a lamp with a smaller profile, to be installed on the wall with no switch or plug visible. Due to the low cost and to keep all staircase lamps in the same series, we decided to buy a couple of Ranarp clamp spotlights and hack them:
 |
| Hacked |
Materials we used:
- Ranarp clamp spotlight
- Candle holder
- Metal drills (4, 5 and +9mm)
- Off-white (and a very small amount of black) spray paint
- x1 5mm bolt and nut
- x2 4mm brass screws
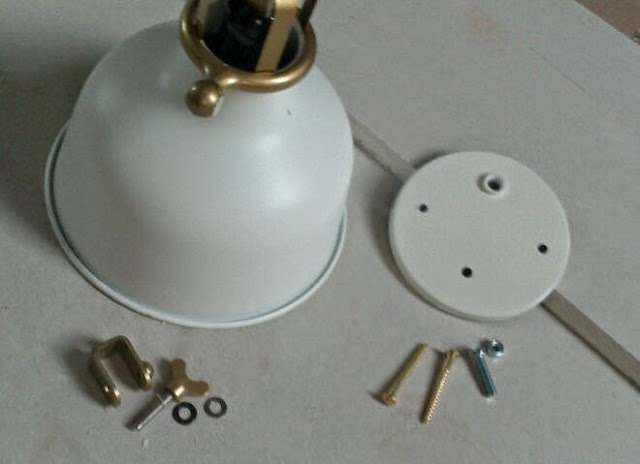 |
| Materials on the right: extra materials on the left: lamp parts used |
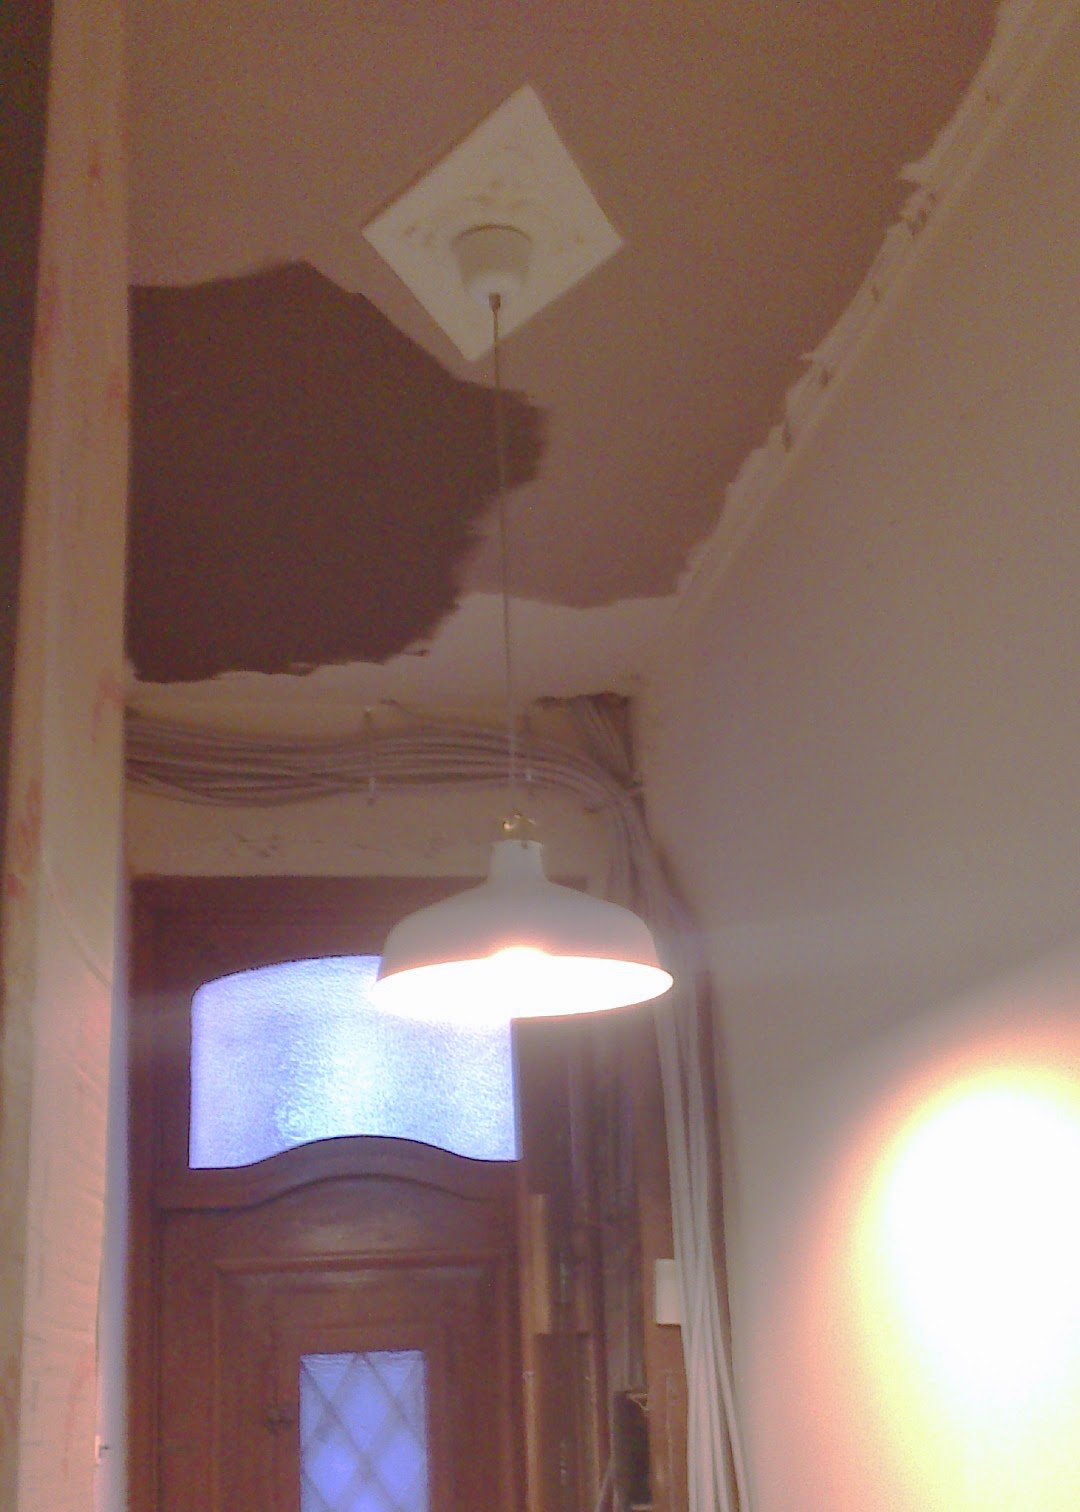
Detailed explanations below. All the process images are rather dreadful phone snapshots. Right now we're still house renovating, I'll post pictures of the finished staircase once that's available! These will have to do for now:


What we did:
 |
| Candle holders with a couple of layers of paint and marks for holes. |
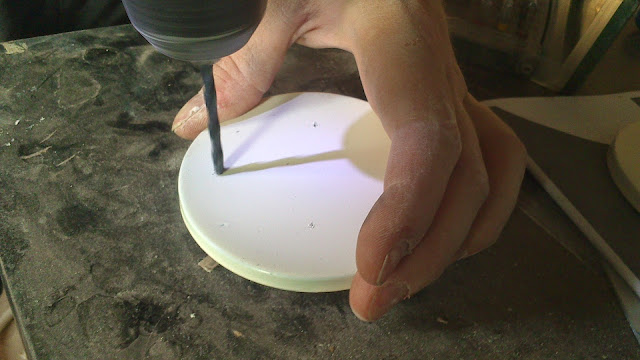
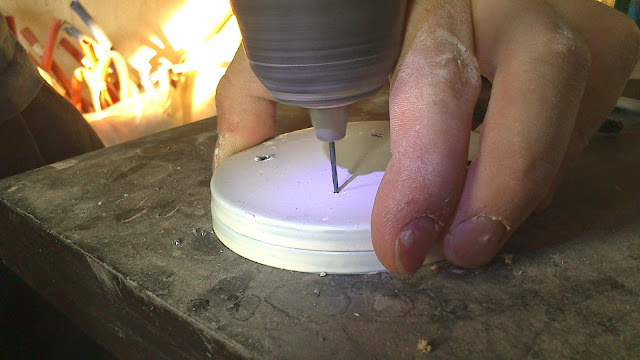
The dishes I found were black, and sturdy but thin (steel I would say), 9cm in diameter and about 6mm deep (might have been too shallow for a surface installation, to hide connections and cables within). They had some rubber anti-slip stickers at the base (what would become the surface in this case) and I removed them by pulling them off, then the stubborn residue with turpentine.
I then gave a couple of coats of white spray paint (I used RAL 9001 creamy white - not a perfect match, just what I had on hand), marked and proceeded to drill four holes on each plate. I guess I could better have painted all the layers of paint after drilling, but I didn't.
 |
| Drilling holes. |
We drilled two holes along a line for screwing to the wall* (5 mm drill - the thickness of the brass screws we were going to use), and perpendicular to those along another imaginary line, one for the cable (9 mm, our largest metal drill, but I had to enlarge the hole with a file, so I would recommend 10 to 12 mm), and another one of 4 mm for the bolt that attaches the lamp to the dish.
 |
| Marking the hole positions for the second lamp. |
When drilling the larger hole, it is useful to drill a smaller hole first (easier to keep in the right spot) and then use the larger drill. If hacking more than one lamp, it's also useful to drill one and then mark the second with the first as a template.
 |
| Filing the raw edges. |
 |
| Plug box for plasterboard. |
 I filed the edges of the holes smooth with a round jewellers needle file, and enlarged the 9 mm hole with a larger round file.
Then came two more coats of paint. I covered the cable hole with a little piece of plastic left over from hacking another couple of Ikea lamps, I'll post about those if and when it turns out ok! It is a nice finishing touch but not at all necessary if the edges of the cable hole are filed smooth. The purpose of this piece of plastic is the exact same on the original lamp (Kroby).
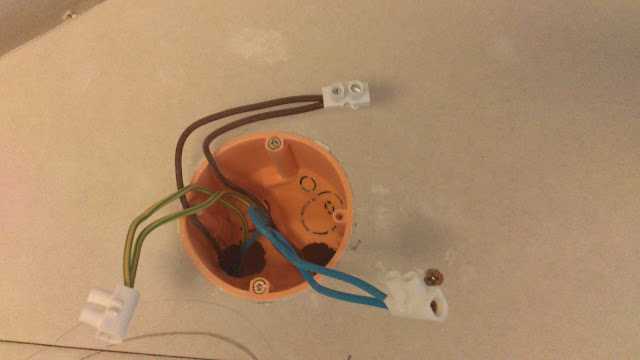
*As we were going to install these on plasterboard, we decided to use a plastic box that is normally used to install an electrical outlet on plasterboard. It works perfectly for these lamps, serving as a deep receptacle for cables and connectors. So the holes we drilled on the dish for attachment to the wall were 7 cm apart, the distance dictated by the screws on these orange boxes.
When it comes to the lamp itself, I cut the lamp's cord halfway between the socket and the switch. Not much cable is needed for installation on the wall, and this nice cable can then perhaps be used for another lamp later on.
 |
| Cutting the cable. |
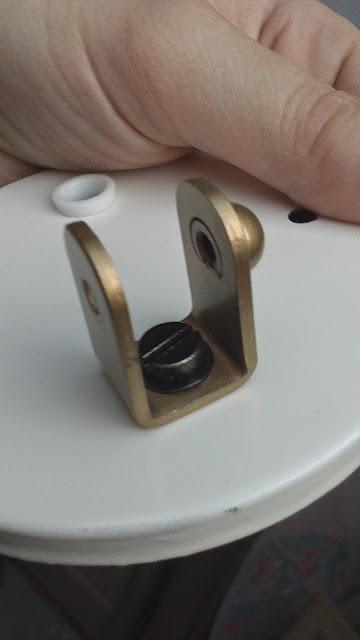
We removed the bolted lamp holder from the clamp itself. I kept the washers around this bolt too. This was a little hard, we needed a wrench with the help of strong pliers to loosen it at first. It is an 8mm wrench:
 |
| Dismantling the clamp. |
I used the 5mm bolt and nut (I sprayed the head of the bolt with a little bit of black paint because the silvery tone bothered me, but it is barely visible...). I bolted this piece to the 5mm hole in the plate, using one of the black washers on the visible side, and one of the silvery ones on the inside).
 |
| Bolting the attachment part to the plate. |
In our case, the long bolt would interfere during the installation, so we cut most of the excess off with a hacksaw:
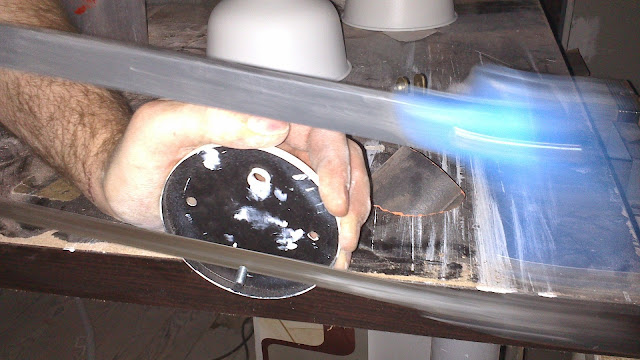 |
| Shortening the bolt. |
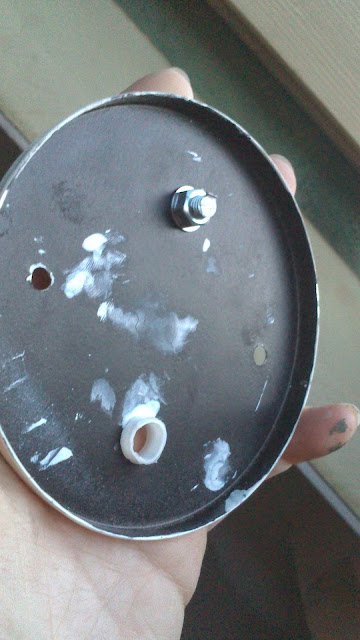 |
| Inside of the plate. |
We were not even close to finishing the staircase wall, but wanted to install the lamps to have some light, so I painted just around the "socket" before installing them. We threaded the cable through the largest hole but left it hanging, since it is easier to screw the plate to the wall this way. Then we connected the wires and screwed the plate onto the socket box:
 |
| The box comes with it's own screws which we removed. |
 |
| Connecting the wires. |
It was important to hold the lamp while screwing to the plate, otherwise the cable might come out too far, with the fabric covering it, which would be too difficult to push back in once installed:

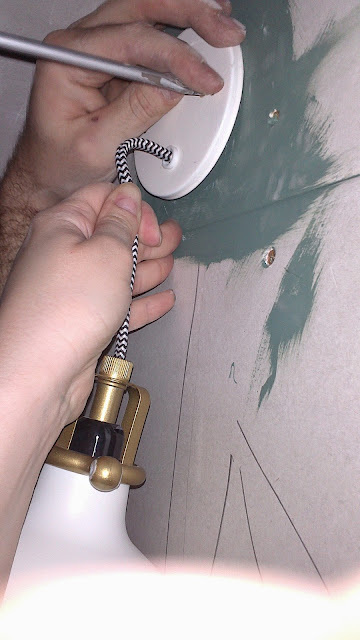 |
| Screwing the plate onto the box. |
Then finally the lamp can be clamped to the plate with the golden wingnut, being careful to catch the cable behind the lamp, and it's done!