Tuesday 27 August 2013

Living room double doors

Unfortunately, the double doors from the living room to the front rooms (not sure how to call them yet! we basically have three living rooms...) have been eaten and scratched by a doggy, then ineptly "fixed":


Not pictured here, some of the wood between the glass is very damaged, and also difficult to fix. So, on an intact place, I took a "mold" with plasticine to make a metal template-spatula:


With this, regular spatulas, and a variety of fillers I've been trying out, for the last days I've been working on the reconstruction of the doors. Slow work.


Due to the deep damage, they have to be painted. We've chosen semigloss black paint.

Sunday 25 August 2013

Window images

A few window images :) They are finished on the outside, but on the inside the plasterer is working today. Inside finished pics to come once we install insulation and paint.

For once, I didn't use a crappy phone camera:

House + driveway

Pim's father called this curved element snor (moustache),
 and I have to say I much prefer the term to Napoleon hat!

The glass has a film that adds to the insulation value,
plus makes the windows a little mirrored on the outside.

Mosquito nets were made to measure for all rooms

Comfortable brass handles

We requested the spacer between the glass to be painted black,
since we thought aluminium looked terrible with wood


The arches at the back of the building are shallower,
so we had these windows made square on the inside

Bedroom

Living room. All windows have a basculating function (this is standard in Belgium)

A mention to our window contractor Belisol, who've done a fantastic job!

Thursday 22 August 2013

Windows

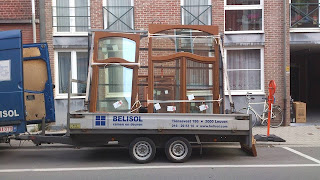
The windows have arrived and are being placed now! More pictures tomorrow.


Quick update:


Monday 19 August 2013

Radiators & hall

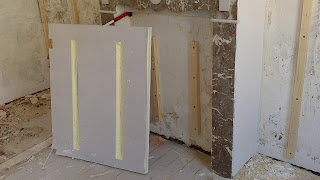
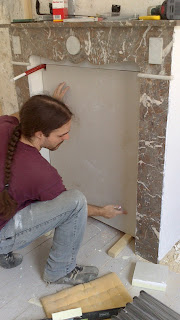
Yesterday Pim's father finished the cement work between the bricks on the living room window, Pim fitted the insulation inside the mantel where the bedroom radiator will go, and worked on the channel for the living room's radiator pipes. We also laid the pipes down into the room.
And me, well it never seems like I do much ;) I spray painted some plastic pieces for the radiators, started fixing the living room doors which have been destroyed by a dog (more on that later, I guess) and primed the moldings in the hall:

So pretty


The corbels were painted orange, so I gave them two layers of primer. These colours to the right are for the entryway. Now, I still can't decide if I paint the medallion the same grey than the rest of the hall ceiling, or the creamy of the wall and corbels. We're extending the upper molding from the corbels around this ceiling portion to divide ceiling and bit of upper wall (around 15 cm) from the rest of the wall. The medallion also has a similar simple molding around it which I think would help divide the colours. I'm afraid the dark grey would obscure the subtle details. I am also afraid that painting the molding a different colour could look a little crappy.
Beautiful brass and wood thermostatic tap in place.
The radiators are still wrapped in foil to protect them.
Space for the wood (the radiator, which is very heavy,
will be screwed to it) carved out of the insulation.

Measuring and cutting insulation.

Fitting into the mantel. We also put an horizontal
piece on the top, since the marble was bare there.

Spray painted protective plastic bits. Looking much better!

Enlarging the channel for the lower curve of the pipe (living room radiator)

Saturday 17 August 2013

Garden intermission

First tomatoes!

These cherry tomatoes were the first to ripen

Big bumblebee busy in huge pattypan squash bloom

Some little pattypans. We've already harvested quite a few of these
at different points of maturity . There are many more coming!

First and weirdest beef tomato (cœur de bœuf). Very good!

Long weekend

We were looking forward to this long weekend (Thursday to Sunday) to have more time to work on the house. Needless to say, by now (Sat) we are already broken! Today we did some shopping and left it at that, to get some rest.

Plaster, paint, a taller ladder and some other stuff
We have been placing pipes for central heating. We have changed our mind and decided to put the kettle in the attic, where the workshop will be, instead of the laundry room in the ground floor.

Removing a few more bricks from the chimney in the attic
Cold water and gas have to come up to the kettle in the attic from the basement. All the pipes with hot water will then branch down into the floors below. This way, warm water will take a longer time to arrive into the kitchen, which is next to the laundry room (we can still place a little electric heater under to sink to supplement hot water), but there will be a lot less pipe to lay, and easy access to the collectors in the workshop, where we do not have to hide them, or not much anyway.

Warm and cold water pipes going down from the attic
Originally the collectors for the central heating would have been placed in the room below the workshop, the bathroom, but this was problematic due to the large amount of pipes and bulky collectors we have to place, and having access to them was going to be challenging.

Pipes going down the chimney hole
Once we have three radiators placed and connected, a guy can already come to set up the gas pipe to the kettle and start up the heating system. We will place the radiators in the bedroom, the entry hall and the living room. This means we have to already finish the walls behind them. The two pipes on the right on the picture above are for the bedroom radiator, and are already laid out. We made holes for the pipes leading to the hall radiator as well. The radiator is very tall but also very thin, since the entryway is very narrow:


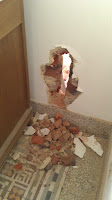
The wall here is so thin that the hole for the pipes broke through to the other side on the lower bit. Oops. It turned out to be a good thing since we needed more space to have a wider curve for the warm water pipe at the bottom, which cannot be curved at a too tight a curve. Due to the thinness of the radiator, we better put the tap in a way that we won't hit our ankle with it, and so the pipe has to come from below, not at 90 degrees with the wall. I'll take a picture to illustrate this once it is installed.

The windowsill in the living room also had to be raised before the contractor comes to place the windows, as I mentioned in the previous post.


The old window and stone windowsill outside was removed, then two rows of bricks laid (recycled from the chimney), and the stone placed back:


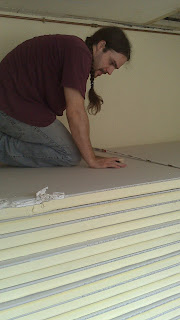
We've also received the first delivery of insulation!


Picture on the left is insulation with drywall attached, most pipes and electricity will be hidden behind it (in a few other cases, like above, we have to cut holes in the wall to lay them). The other insulation will supplement behind the first one, that one it is better at sound isolation.